1
What you need
eIDRent runs on an iPhone or an iPad with iOS or iPadOS 26.5 or newer. Nothing else is needed to get started: renting out, keeping a product list and taking items back all work without extra hardware.
Two devices join in if you want more
- A Bluetooth card reader to read the identity card: the Zetes Sipiro M BT or the FEITIAN bR301BLE. Without a reader the app works fine; you simply skip the identification step.
- A receipt printer for the rental ticket: a thermal printer with a network or wifi connection, or an AirPrint printer.
Where do you buy one?
We work with the Sipiro M BT 4.0, also sold as the FEITIAN bR301BLE. That is the model eIDRent was tested and tuned with.
- Indicative price — € 85 excl. VAT
- Delivery — 1 to 2 working days
- Shipping — free from two devices
- Available at — eidshop.be
- In the box — the reader and a USB-A to USB-C charging cable, 24 months warranty
Sign your device in to iCloud if you plan to work with more than one iPhone or iPad later on. See chapter 11.
2
Try it out first
Before entering your own data, you can fill the app with sample material. That way you see straight away what a busy afternoon looks like.
- Go to MoreThe last tab, bottom right.
- Choose Load sample dataUnder the heading Try it out. The app fills up with a few go-karts, a quad and some running rentals.
3
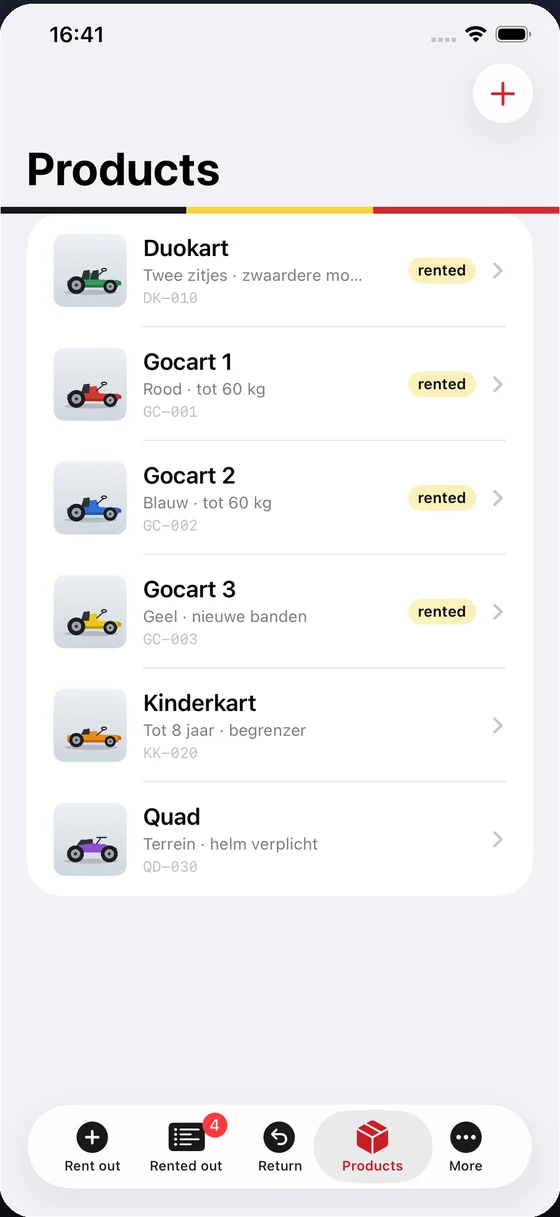
Entering your products
Everything you rent out is entered once. After that you simply pick it or scan it at each rental.
- Tab Products, then the plus buttonTop right.
- Give it a name„Go-kart 3” reads faster at the counter than „Kart”.
- Fill in the infoA short description: colour, condition, anything worth noting.
- Add a codeThe barcode or QR code stuck on the item itself. Scan it with the camera or type it in.
- Take a photoHandy when items look alike.
4
Starting a rental
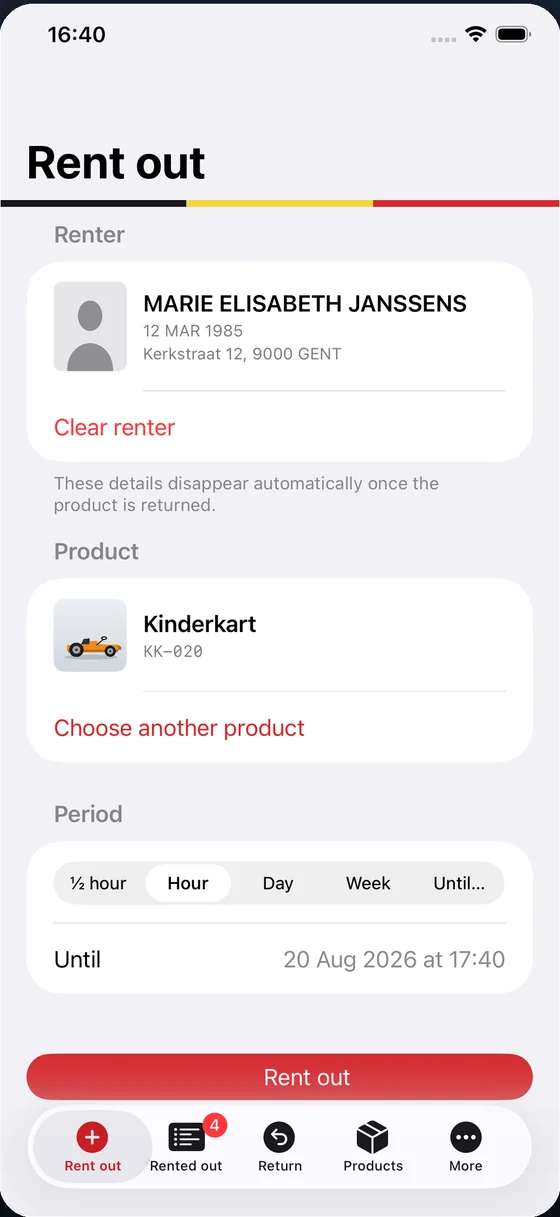
This is the screen you will use most: the Rent out tab. From top to bottom you work through three blocks.
- RenterTap Read eID to read the identity card. This is optional — skip it and the rental simply has no name attached.
- ProductScan code with the camera, or Choose from the list. Scan a code that does not belong to anything yet and the app offers to turn it into a product.
- PeriodHalf an hour, an hour, a day, a week, or Until… for an end time of your own. The end time appears right under your choice.
- Press Rent outThe rental is recorded. If a printer is set up and automatic printing is on, the ticket comes out immediately — no confirmation needed.
Whatever is out at that moment disappears from the list. So you cannot lend the same go-kart twice at once.
5
Connecting the card reader
The identity card is read by a separate Bluetooth reader. You connect it once; after that the app finds it again on its own.
- Switch the reader onIts light should blink.
- Go to More → Card readerThe app searches for readers nearby over Bluetooth.
- Pick your reader from the listFrom now on its name appears next to Card reader.
- Back to Rent outPut the card in the reader and tap Read eID.
The app takes the surname, given names, date of birth, address and portrait straight from the chip. That takes a few seconds.
If something goes wrong, More → APDU traffic shows the full conversation between the app and the card. It is technical, but it is exactly what someone needs to help you.
No reader yet? More → Buying a card reader tells you which model we use, what it costs and where to get one. Chapter 1 repeats it.
6
The overview: what is out
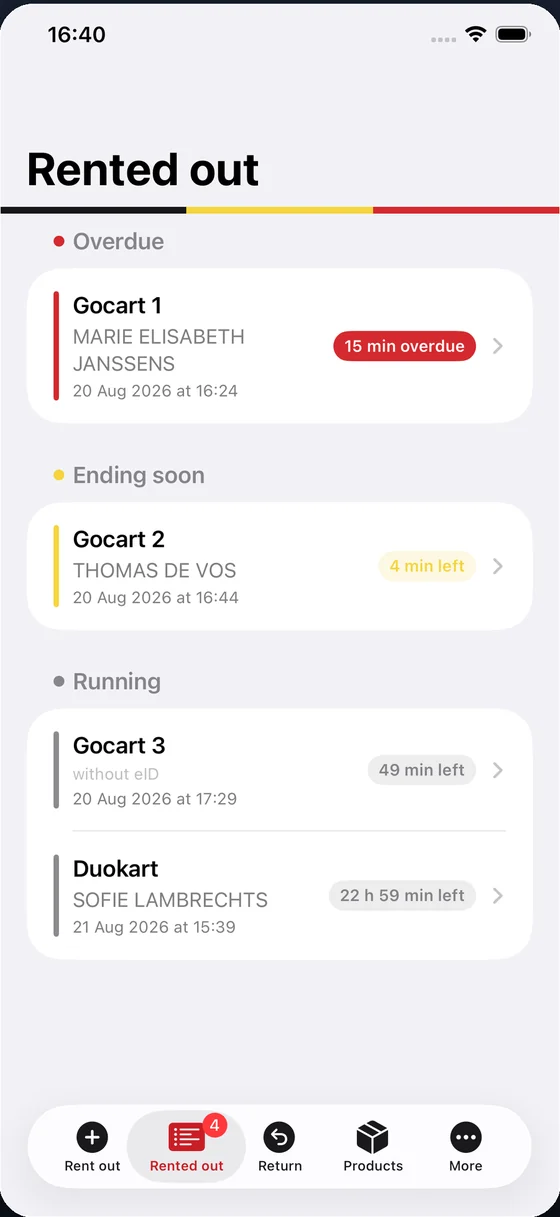
The Rented out tab is your dashboard. The colour tells you everything:
- Red — overdue. At the top, because that is what needs solving.
- Yellow — ending within the half hour. Time to keep an eye out.
- Grey — running, nothing the matter.
Tap a rental for the full picture: product, period, the renter with their portrait, and the QR code for this rental. That is also where Print ticket again and Product returned live.
7
Taking an item back
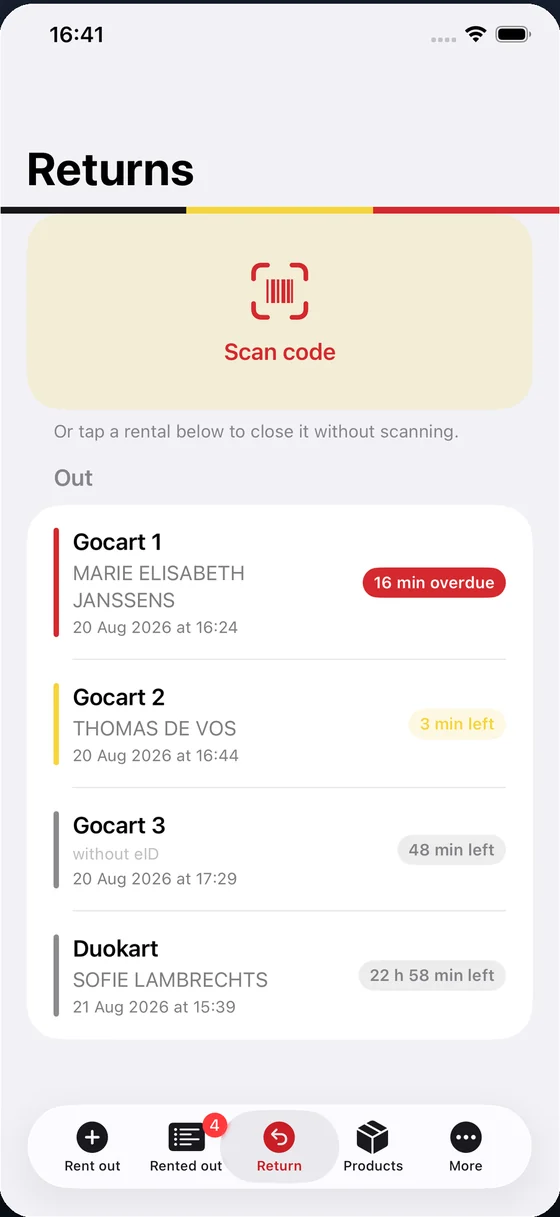
Tab Return, then Scan ticket or code. The camera recognises two things:
- The QR code on the rental ticket. It points to one particular rental. Even with three identical go-karts out, the right one closes.
- The barcode on the item itself. Handy when the ticket has gone missing.
If scanning will not work, simply tap the rental in the list below. Or use Enter code manually in the scanning screen.
Every return does the same thing: the rental moves to the history and all the renter's data — name, date of birth, address, card number, portrait — is erased. What remains is which item, from when until when.
8
Your company details and the ticket
Go to More → Company & ticket. What you enter here appears on every rental ticket.
- Logo — pick an image from your photo library. A receipt printer prints in black and white, so a logo with crisp lines comes out far better than a photo full of greys.
- Name, street, postcode and town, phone — these lines sit under the logo.
- Closing line — optional, at the bottom of the ticket. Your opening hours, for instance, or a short rental condition.
The ticket shows what the item is, when the rental starts and ends, how long it runs, and at the bottom the QR code for the return. The renter's name is deliberately left off, so no personal data leaves the building on paper.
9
Setting up the printer
There are two roads to paper. Set up both and the receipt printer wins.
A receipt printer on your network
This is the cheapest and the most dependable route. An ordinary thermal receipt printer with wifi or a network cable will do; it costs a fraction of an AirPrint model and prints the QR code more sharply, because the printer draws it itself.
- Find the printer's IP addressIt is usually on the test page it prints when you switch it on, or in its own menu.
- Enter it under Printer IP addressFor example 192.168.0.50.
- Leave the port at 9100That is the right one for almost every receipt printer.
- Choose the roll width58 or 80 mm — have a look at the roll that is in there.
- Press Print a test ticketA ticket with made-up details comes out.
An AirPrint printer
Without a receipt printer on the network, AirPrint will do. Tap Printer at the bottom of the screen and pick one from the iOS list. The ticket is then printed as a laid-out page rather than as a receipt.
Automatic or not
With Print automatically on, every new rental produces a ticket by itself, with no screen in between. Switch it off and you only print deliberately, through Print ticket again on a rental's screen.
10
Language, history and clearing up
Language
More → Language: Dutch, French or English. It is independent of your device language, so a French-speaking colleague can work on the same phone.
History
More → Returned shows every closed rental. Swipe left to delete one, or use Clear all at the top right. There is no personal data left in there — that was erased at the return.
Erasing everything
More → Try it out → Erase all data empties the app completely: products, rentals, history. Your company details and your printer setting stay put.
11
Working with more than one device
Sign all your devices in with the same Apple Account. Products, rentals and history then appear on each of them. This runs through your own private iCloud: there is no server of ours, and we cannot reach your data.
One purchase covers all your own devices. If your staff use their own Apple Accounts, that is a separate purchase per account; for a business, Apple Business Manager is the tidiest route.
12
What happens to personal data
- The Belgian national register number is never stored. The app reads it from the card but saves it nowhere.
- The renter's data is erased automatically at the return.
- The ticket carries no name, only the item and the times.
- The data sits on your own device and in your own iCloud. Nothing is sent to us, and the app contains no analytics and no advertising.
As the rental business you are the data controller for your customers' data. The full privacy policy is on a separate page, linked at the bottom.
13
When something will not work
No card reader found
Is the reader on and is its light blinking? Is Bluetooth on for your device? Otherwise go back to More → Card reader and pick it again.
The card is not being read
Push the card all the way into the reader and try again. The app makes several attempts by itself, so give it a few seconds. If the reader had just fallen asleep, the second attempt usually succeeds.
No ticket comes out
Run through the list: is the printer on, is it on the same wifi network, is the IP address right, and did you give iOS permission for the local network? Test with Print a test ticket — it tells you at once whether the printer answers.
Scanning does not work
Check that eIDRent has access to the camera in your device settings. On older devices scanning is sometimes unavailable; use Enter code manually at the bottom of the scanning screen instead.
A product is missing from the list
Then it is probably already out. Have a look under Rented out: items on loan disappear from the list until they are back.
Anything else
Write to info@filemakerlab.be. Mention which device you are using and what you were doing exactly — that saves us guessing.